Why do you need to enable HTTPS for your WordPress site?
HTTPS secures your data transmitted in the network by encrypting it so that the intruder can’t see and tamper the data. It is important to protect your web with HTTPS, whether your web is big e-commerce or just a simple blog. This article will show you how to enable HTTPS for your WordPress site using Amazon CloudFront.
Why use Amazon CloudFront?
You can use free public SSL/TLS certificate provisioned by AWS. It can be integrated with CloudFront. You can use CloudFront for free for one year because Amazon offers AWS Free Usage Tier for one year. More about CloudFront pricing here. CloudFront not only enables HTTPS for you but also acts as a CDN. Which means it can improve latency to your site.
See diagram below
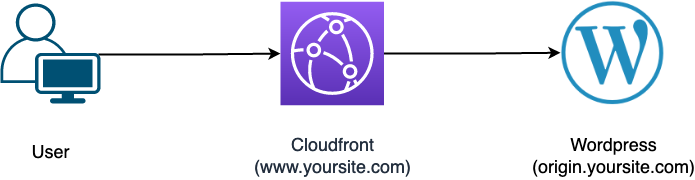
The user’s request is received by CloudFront. If the cache is available, the cache will be returned. If not, it will fetch the resource from WordPress. We assign the www subdomain to the CloudFront address and something like origin to the WordPress server address.
The steps:
1. Install AWS for WordPress Plugin
There is a plugin to help us do this. Install and activate the AWS for WordPress plugin.

We will get back here later. Now we need to create AWS IAM first.
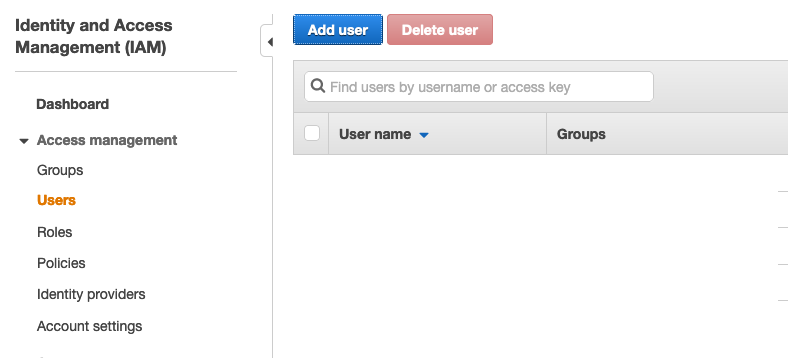
2. Create AWS IAM
- Go to IAM dashboard
ClickServicesthen search and clickIAM. ClickUsers - Click
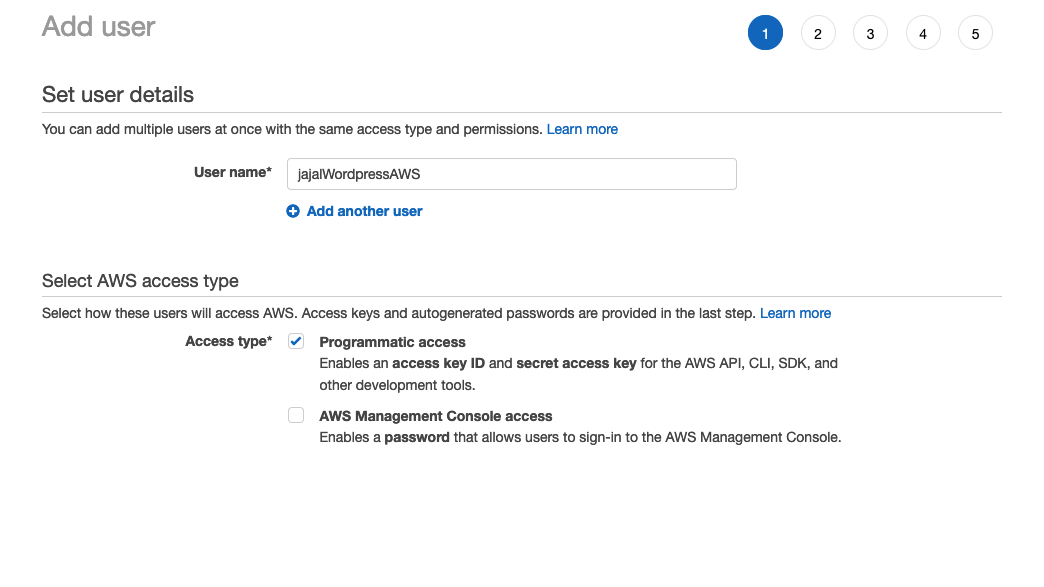
Add User - Input
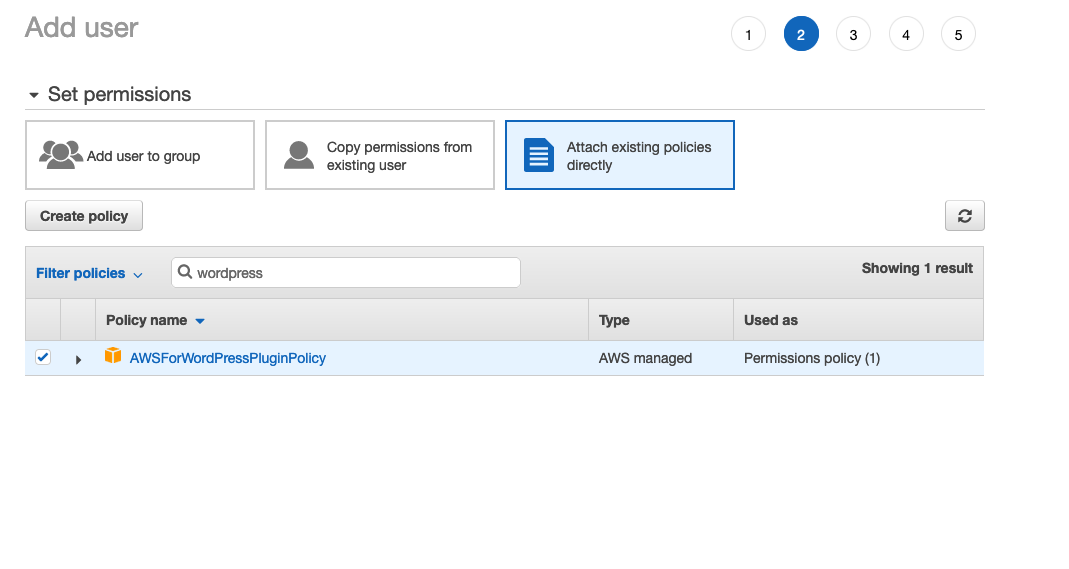
User name. SelectProgrammatic accesstype - Set permission
ClickAttach existing policies directly. FindAWSForWordPressPluginPolicyand tick checkbox. - Add tag (optional). You can add tags if you want
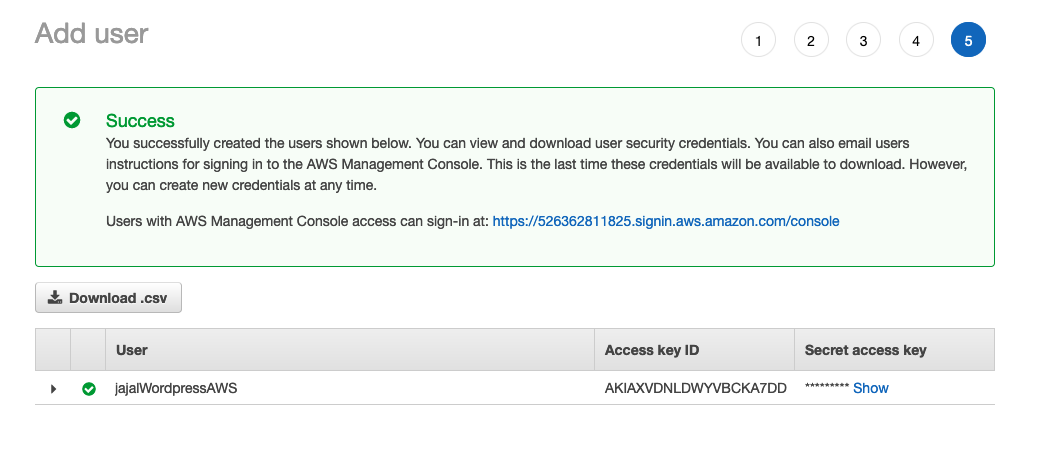
- Click Create
- Download the credential and save it securely
3. Setup the AWS for WordPress plugin
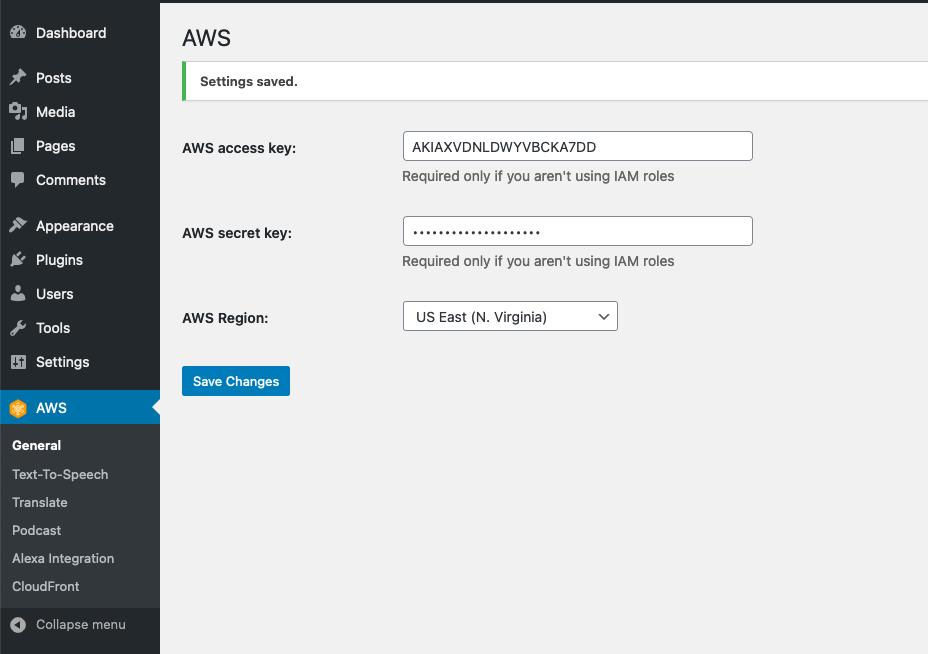
- Go to your WordPress admin page.
- Go to AWS for WordPress plugin general page, then input the IAM access key
- Click Save Changes
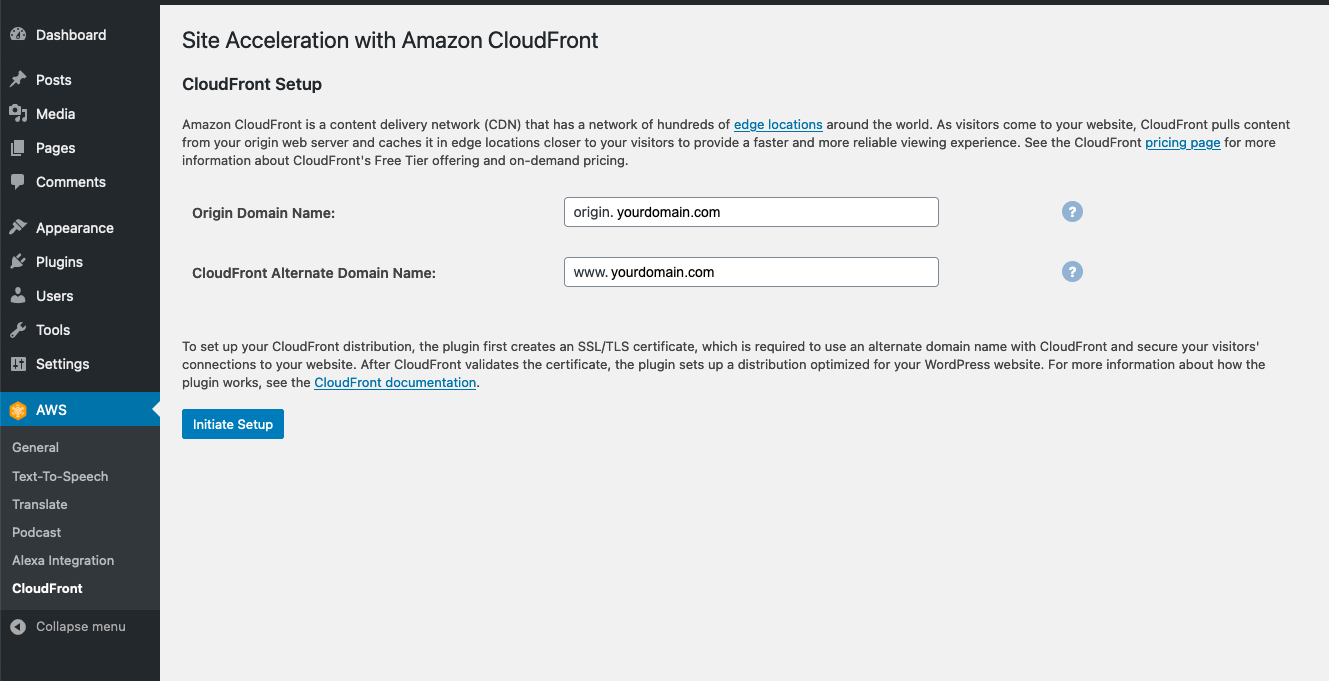
- Go to the CloudFront page of the plugin by clicking CloudFront in the sidebar
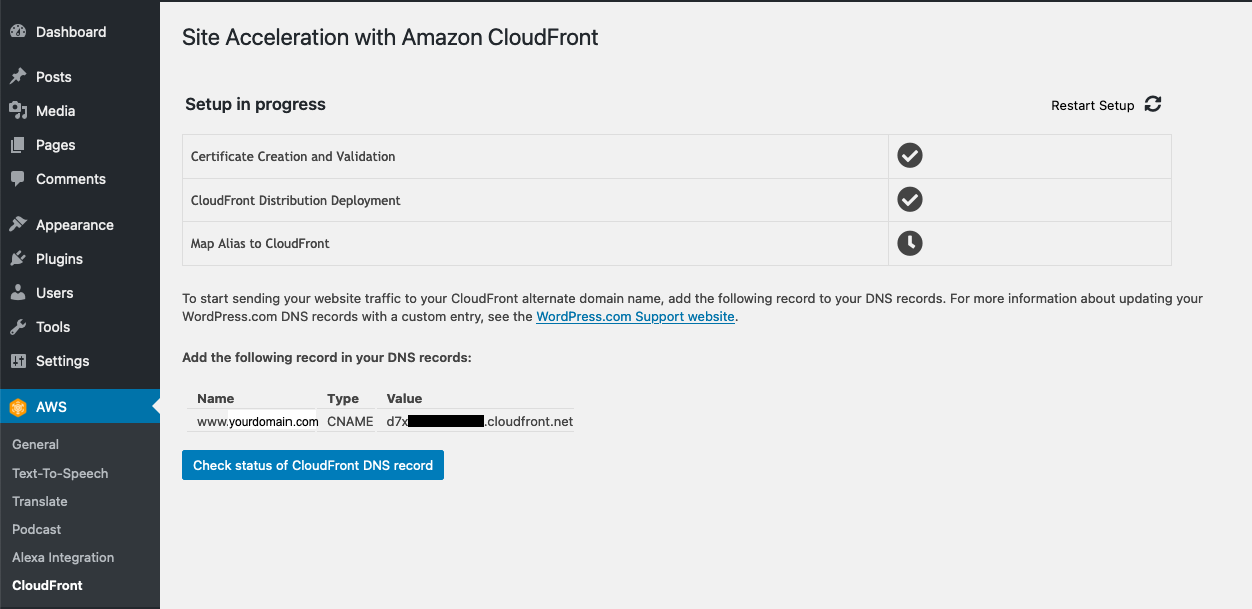
- Input Origin Domain Name and CloudFront Alternate Domain Name. Origin Domain Name will point to the WordPress Server address, while CloudFront Alternate Domain Name will point to the CloudFront address.
- Click Initiate Setup
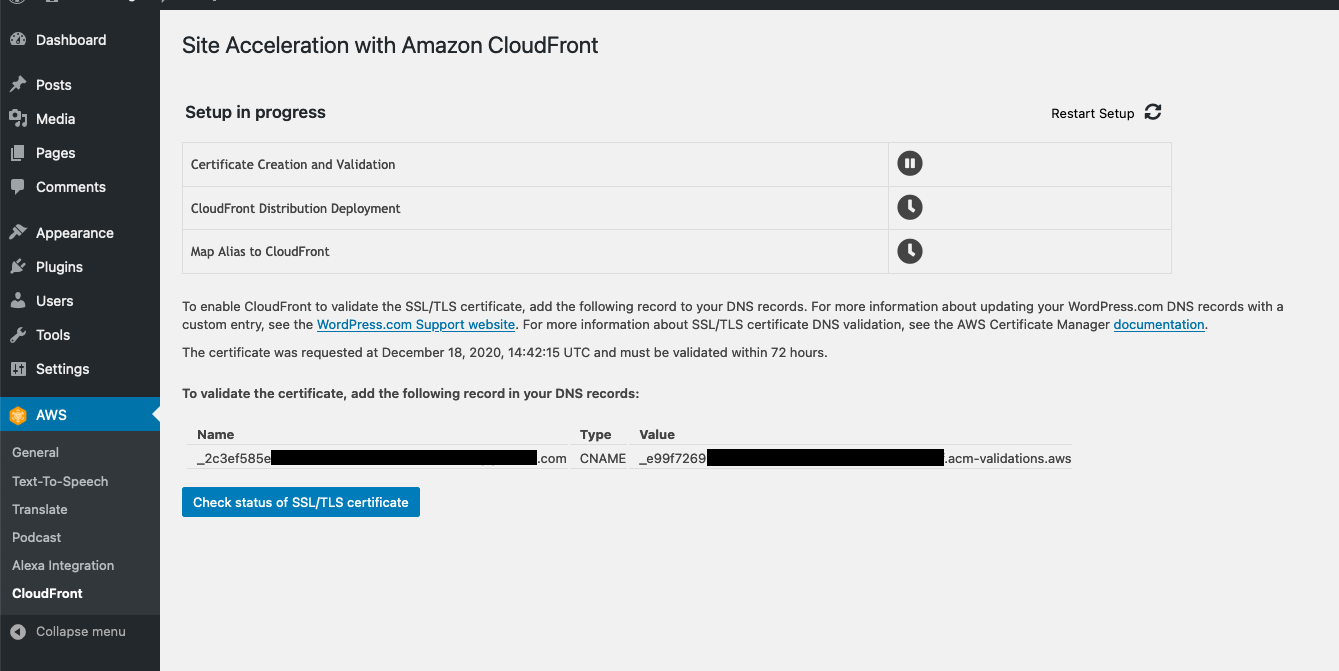
The plugin will create a certificate for our site in ACM (AWS Certificate Manager), then create CloudFront distribution. - Certificate validationYou need to add the record to your DNS record.
- After the record is added, click
Check status of SSL/TLS certificate. If the certificate is validated, the plugin will create a CloudFront distribution. You need to wait for a while for this process to complete. - Point your
wwwsubdomain to the CloudFront address
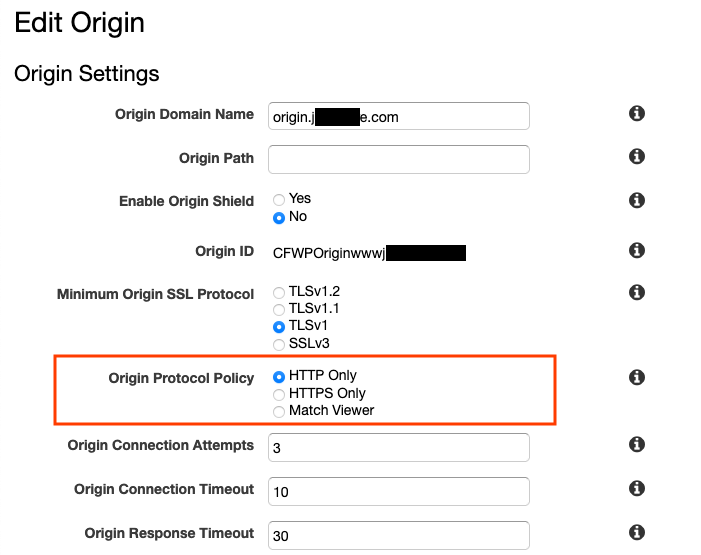
4. Change CloudFront Origin Protocol Policy
We need to change the origin protocol policy to HTTP Only in CloudFront because our origin WordPress server can only handle HTTP requests.
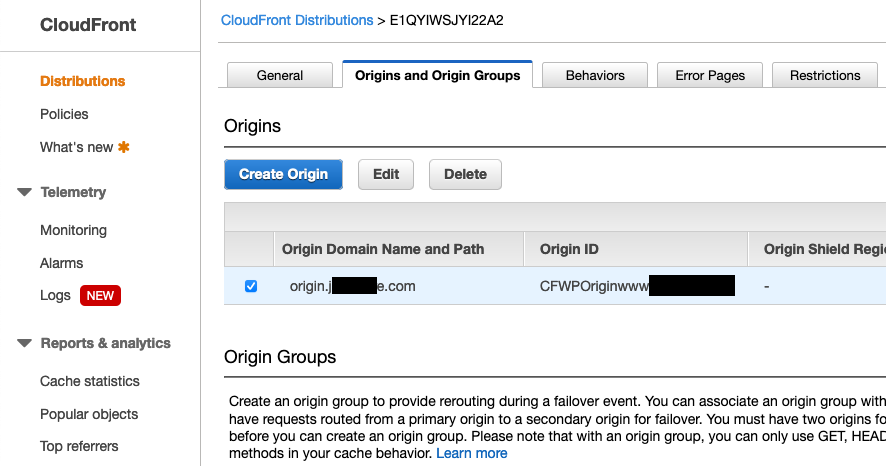
- Go to CloudFront distribution dashboard in AWS console. You can type CloudFront in the search service bar.
- Click your CloudFront distribution. Then click the
Origin and Origin Grouptab. - Tick the origin, then click
Edit - Change the origin protocol policy to
HTTP Only, then click Yes, edit.
Wait for a while until changes are deployed.
5. Update wp-config.php
Open your wp-config.php file. Add this line before require_once ABSPATH . 'wp-settings.php';
$_SERVER['HTTPS']='on';6. Make sure your DNS Record is correct
Make sure that your www already pointed to CloudFront and origin pointed to WordPress.
Finally done. You should be able to visit your WordPress site using HTTPS now. Leave a comment if you found any problem or difficulty.